I was cruisin' the net one day during the holidays and saw a "short" video about this fun looking gift card holder that this lady "whipped up" quickly. I thought it was pretty cool so I went looking for the details. To make a long few hour story short, I finally came up with a recipe that worked! I am documenting the instructions in detail here so that you (and I) can reproduce in the future. You can watch the original video here Note: I asked the originator of the video what size of paper they used and she said 6x6 but she warned me that the size of the paper required depends on the size of the gift card used. This turned out to be really important as the 6x6 was too small for my gift card! I ended up using a 6.5 x 6.5 square.
Supplies:
- gift card - measure the size of your card and adjust paper as required
- designer paper - you don't want it to be very thick otherwise it will not fold nicely and hold its shape
- adhesive - I used some tape runner and a few glue dots
I started with a gift card measuring 2 1/8 inches X 3 3/8 inches and a piece of paper measuring 6.5x6.5.
Cut a piece of DSP to the above measurements. Fold the paper to create a triangle. Crease the seam well.
Open up and take 1 corner and fold into the center line. Crease the seam well.
At this point, I used a circle punch to create a little 1/2 circle cut in this piece to make it easier to remove the gift card. This is optional.
Take your gift card and place in the middle of the large triangle side using the folded triangle as a guide to center. Fold up the smaller side as seen here:
Now you can decide what is the easier way for you to do this next steps. As I was figuring out how to make this, I used a scoring tool to guide me to make sure I was doing things evenly. The next time I made one to create these instructions I "winged it" and didn't measure. Once I new my card was in the middle I really didn't need to measure after that!
Fold the right side in along the card aligning the bottom edges. To do this I felt for the side of the card and then used a ruler to fold up. I made sure there was a "smidge" (like 1/16 or so) space between the edge of the card and the fold to allow the card to be pulled out of the holder. Repeat with the left side.Hmmm, I didn't take a picture with both sides folded in...so using the above pic as reference, take the left bottom corner and fold it in and over the right side corner!
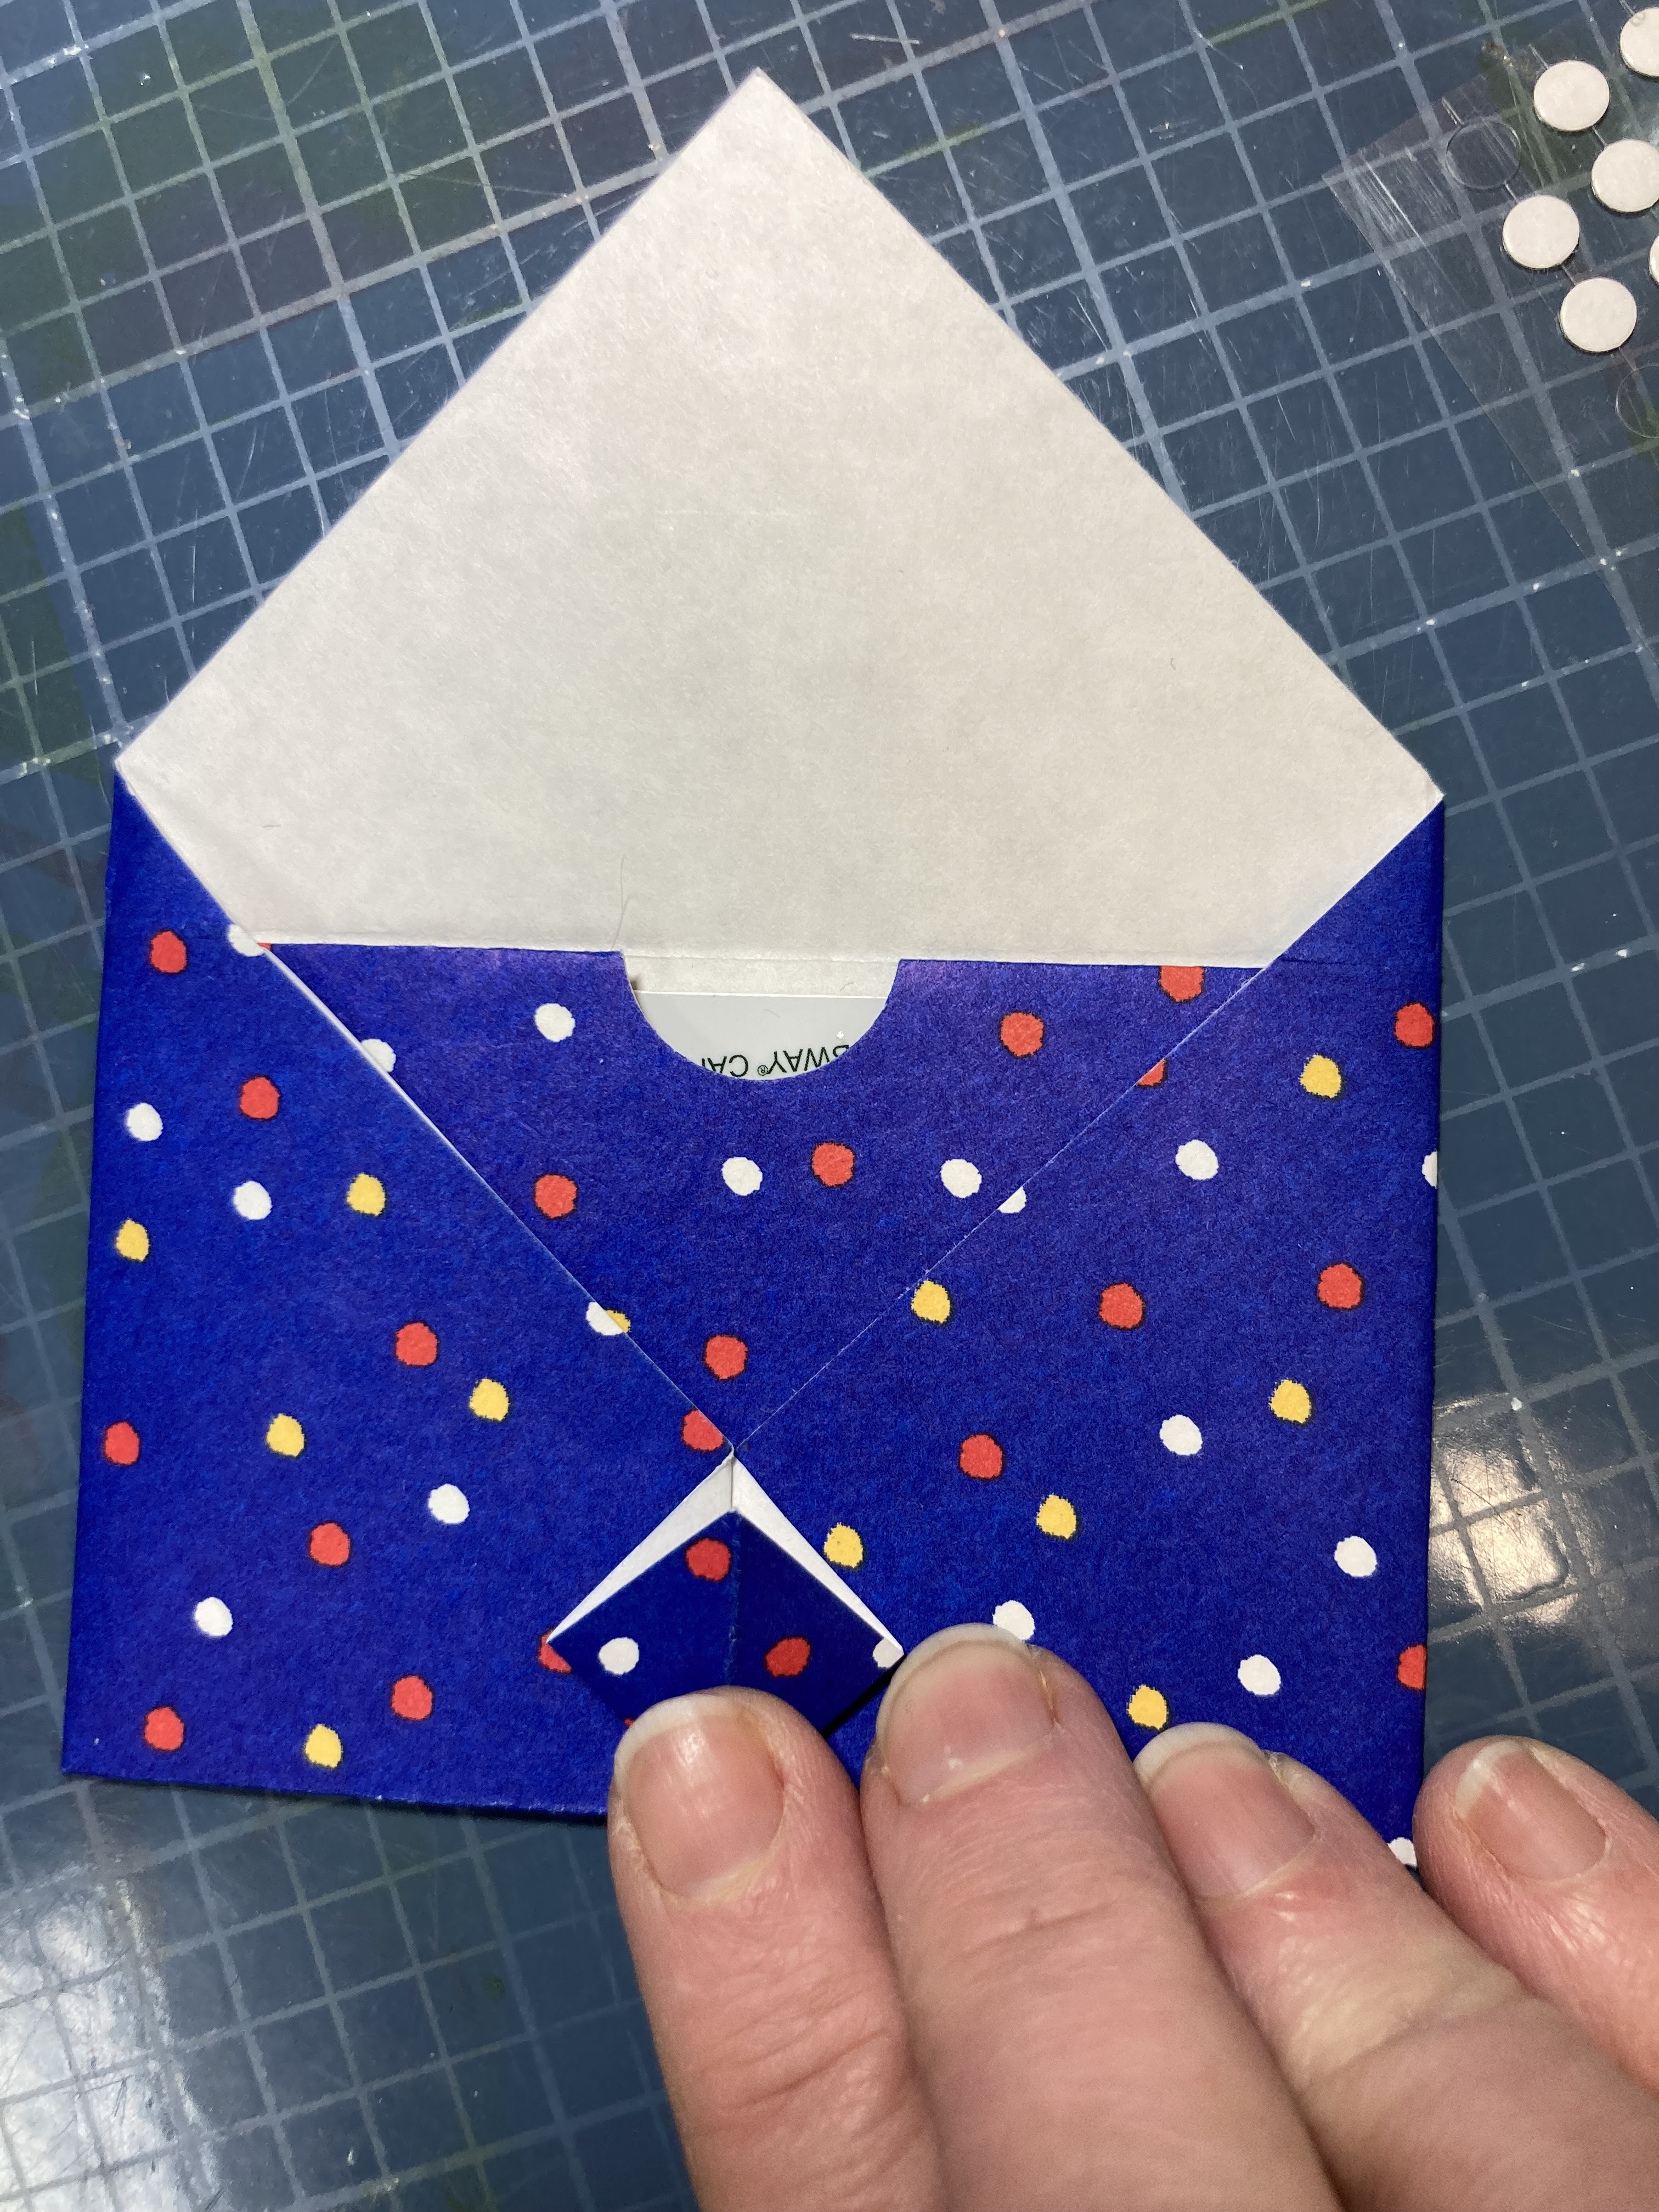
At the point where the 2 folded side triangles intersect, take the left triangle and fold back from this point of intersection aligning the bottom. In the left photo below I am highlighting where they intersect and where you want to make this fold. Crease well.
Carefully open up the newly created triangle to make a diamond shape.
I placed a glue dot to hold down the 2 folded sides as well as on the 2 back sides of the diamond shape to hold in place.
Fold down the top and tuck the point into the diamond.
The finished view from the back:
Decorate the front of your gift card holder!


No comments:
Post a Comment